pfSense webGUI Configuration
Connect the LAN port on your pfSense_Appliance to your Admin_Device and navigate in your web browser to 192.168.1.1. You
will get a warning, ignore it and continue (if you see this warning when trying to access any websites on the public internet, make
sure to NOT ignore this warning and do no submit any personal information).
You will be on a login page, use admin as your username and pfsense as the password. It is recommended to click the message
at the top regarding changing password and change it immediately if you did not get the Setup Wizard at the beginning, if you
did then you will be prompted to change it at the very end of your setup steps.
You should be launched into Setup Wizard and if not, select System from the menu at the top to bring up drop down menu and select Setup Wizard to start it. This takes you through initial configuration options. Instead of walking through all the options I’ll note what options I changed from the default and why.
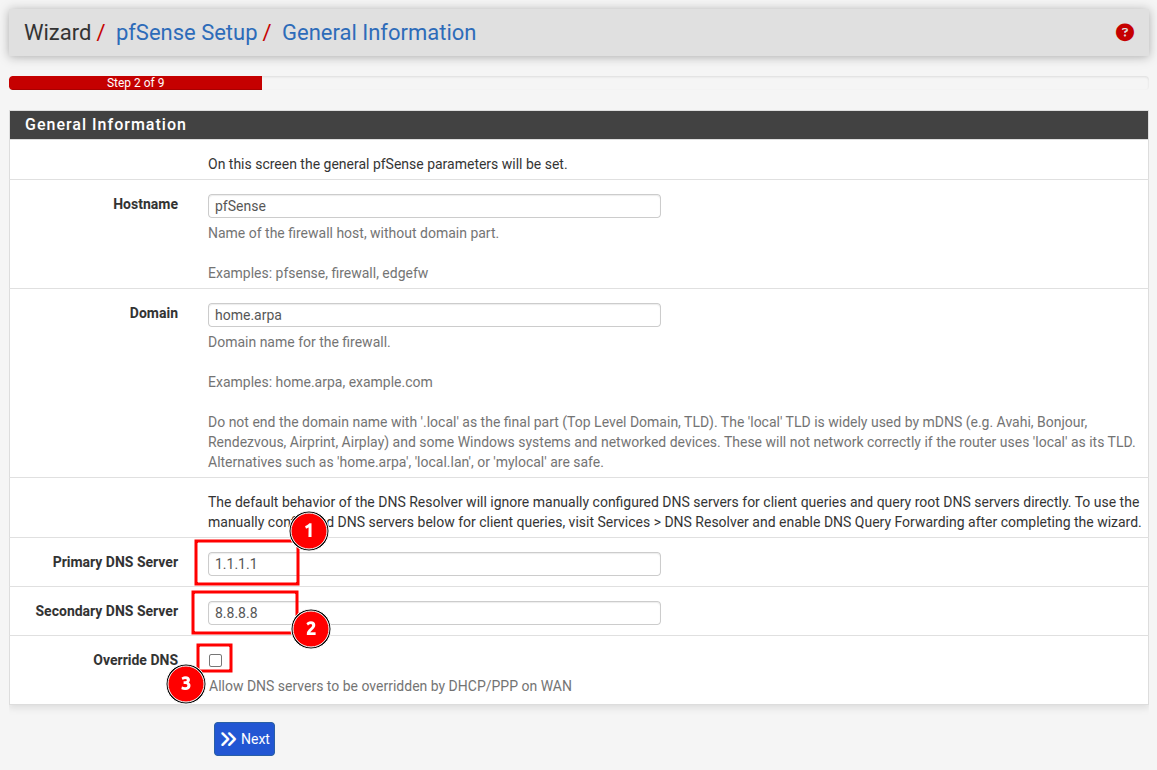
- Cloudflare DNS server because I prefer to not use Google as primary
- Google DNS server because even though I prefer not to use them, I prefer them over ISP DNS in case Cloudflare fails
- If you don’t uncheck this, your ISP router will override whatever you have specified here
I’m also in the process of testing out NextDNS servers but in the past I’ve had difficulty accessing some websites when using NextDNS. I’ll test it in the future and come back to this setting and replace the Primary DNS Server with the NextDNS one if it works out well.
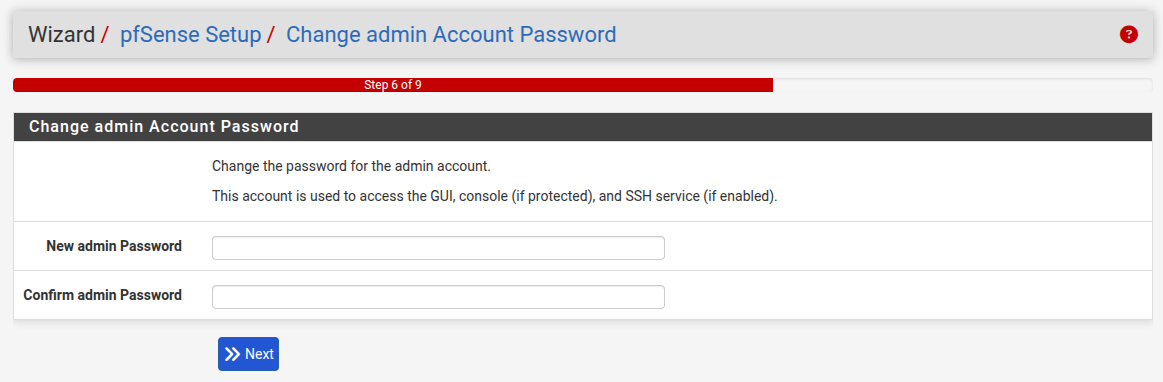
If you haven’t done so already, change the password.
The initial pfSense setup and configuration is complete.
pfSense SSH Remote Access
We will now set up remote access to our pfSense_Appliance so that we will not even need to have a monitor attached to it. This
will alow us to log into the terminal output that is shown on monitor screen remotely and manage it from our Admin_Device via
a secure ssh connection.
On your Admin_Device, use the web browser to log into your pfSense Web Dashboard (192.168.1.1 when connected via Ethernet cable).
Select System from the menu at the top, then Advanced from the drop down menu.
Scroll down:
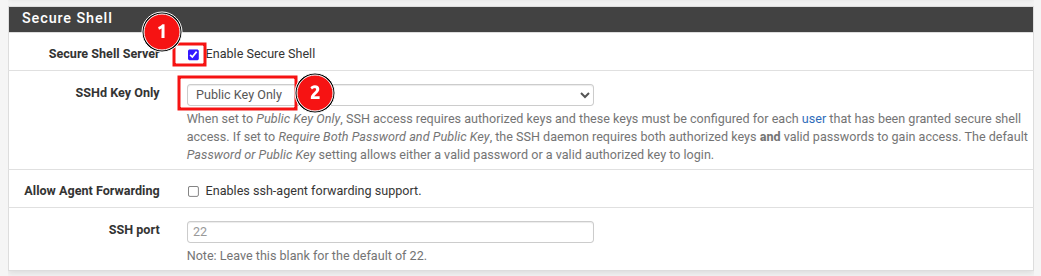
- Check the box
- Public Key Only
Installing Remote Management Tools
Open terminal window on your Admin_Device and run:
sudo apt update && sudo apt install openssh-server openssh-client -y
Followed by:
ssh-keygen -t ed25519 -C "admin-device"
You should see the following output (<username> will actually be your personal username):
Generating public/private ed25519 key pair.
Enter file in which to save the key (/home/<username>/.ssh/id_ed25519):
Simply hit Enter and then set up a strong password (I can’t stress enough the importance of a password manager to keep track of
your secrets). You will get confirmation your key was generated with random ASCII art.
You now have a secure private and public key pair created with the filename of id_ed25519 in the directory
indicated above.
Now you want to output the public key value to screen:
cat ~/.ssh/ed25519.pub
Copy the long string of characters displayed (including the ssh-rsa at the very beginning) then go to your pfSense Web
Dashboard. Click on System from the top menu, click on User Management from the drop down menu.
Click on the pencil icon to edit the admin user and then scroll down until you see Authorized SSH Keys section:
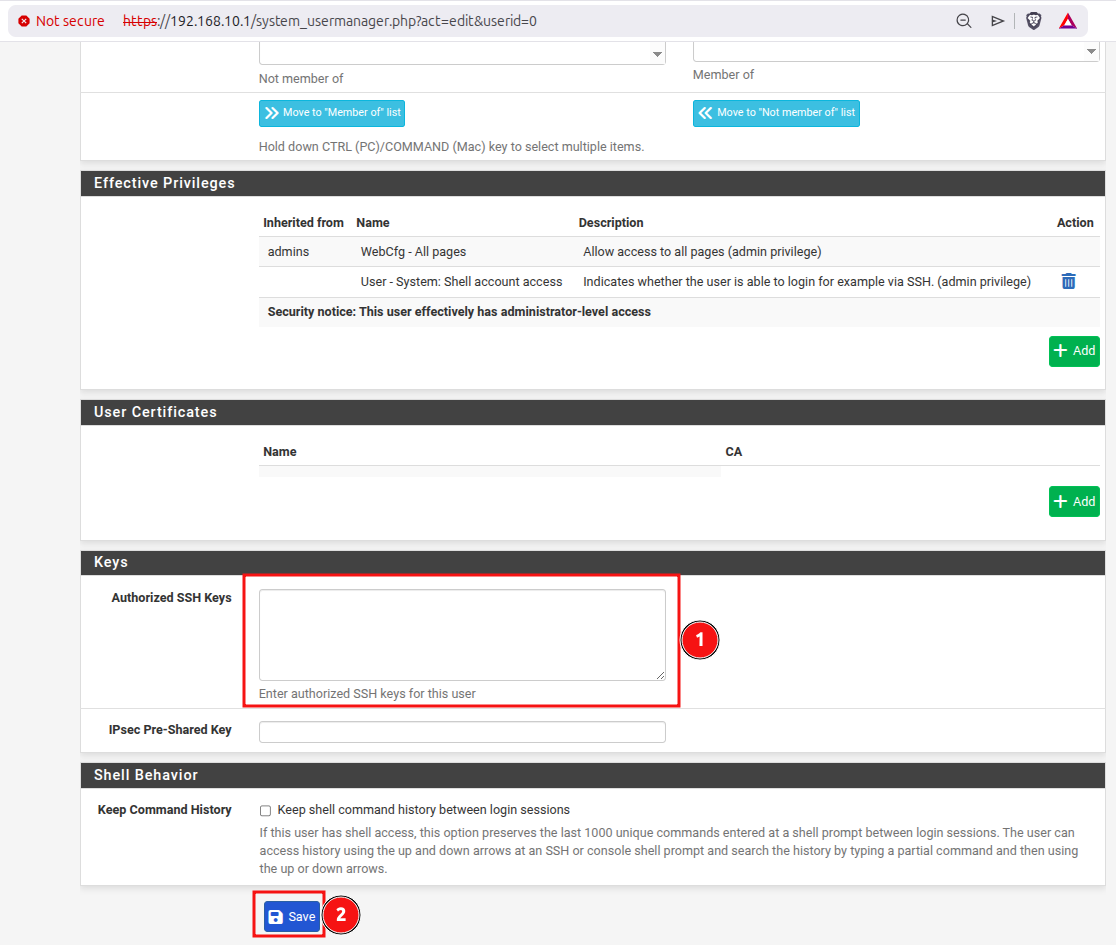
- Copy the key into this space
- Save
Before running the next command, copy the private key password you set up for the pfSense ssh key into your clipboard and then in the terminal run:
ssh -i ~/.ssh/ed25519 root@192.168.1.1
You’ll get prompted for the password and once you provide it you will see the pfSense terminal menu that you have on your monitor that is plugged into the pfSense_Appliance. You can now unplug the monitor and put it away. Going forward you can access the pfSense_Appliance terminal options by simply typing:
ssh root@192.168.1.1
In the future, the IP address we will use will change to 192.168.10.1 but for now until our wireless access points are
configured we will use 192.168.1.1.