Installing pfSense
If you’re not too computer savvy, it can be confusing to know where to locate the pfSense installer files and which one to choose as well as how to actually install it on your mini PC. The next steps walk you through the process.
Downloading the Installer
Go to https://shop.netgate.com/products/netgate-installer and for the Installation Image option choose AMD64 ISO IPMI/Virtual Machines in the dropdown. You will have to add it to cart and go through a checkout process even though the cost is $0.00.
Creating USB Installation Disk
Once downloaded, if you’re using a Linux, simply run gunzip <file_name> using terminal while in the directory where the
downloaded file is located. If you’re using Windows, download 7-Zip and extract the file.
The file is a .iso file and can’t simply be copied to USB disk to accomplish the installation. Plug in a USB drive in your Admin_Device and if you’re using Linux use the Disk utility to Create Disk image or download and install balenaEtcher to handle this. I prefer balenaEtcher as it makes it very easy and has checks to make sure you’re writing to the USB drive and not your hard drive by mistake. If you’re using Windows, download and use Rufus application to do the same.
Installing pfSense on mini PC
Use an Ethernet wire to connect your mini PC to your ISP modem, you can choose any of the two ports.
Plug in and boot up your mini PC. It may come preinstalled with Windows and you may be prompted to go through full Windows
activation. Ignore all that and simply plug in your USB drive and restart the mini PC. As it restarts you are going to want to hit
the key that loads your BIOS/UEFI menu. The key you need to hit varies based on the hardware and you may see a quick flash on
screen that may tell you to hit F1 or F12 key. If the prompt doesn’t flash on your screen you want to try F1, F12, F10,
or Esc keys until BIOS/UEFI menu loads. If Windows start loading, restart and hit one of the other keys mentioned until you get
the BIOS/UEFI menu.
Look for an option that allows you to select boot order and then make sure the USB is ahead of the SSD. In my case, the menu allowed me to specifically select the USB disk and boot into it. In your case you may have to set USB to be the first option, save and exit the BIOS/UEFI menu and upon restart the mini PC will load your USB drive versus the SSD.
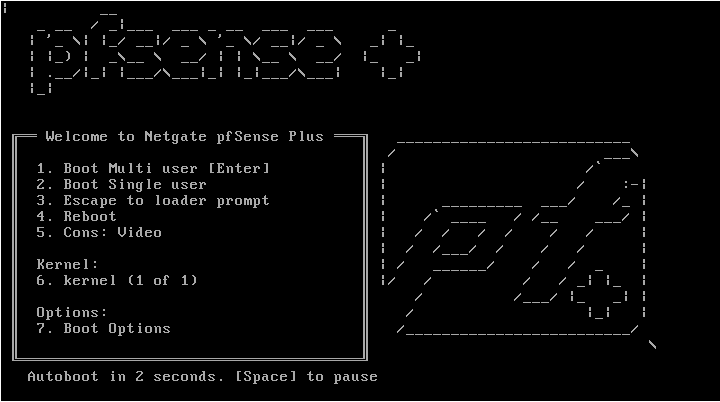
You may see the following image flash for a few seconds:
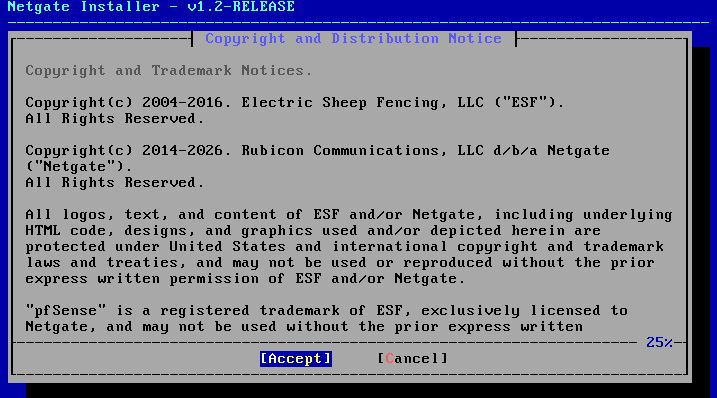
Right after you will see a copyright notice, simply hit the Enter key on the keyboard with Accept highlighted:
At this point, it is pertanent to explain how to navigate the installation menu.
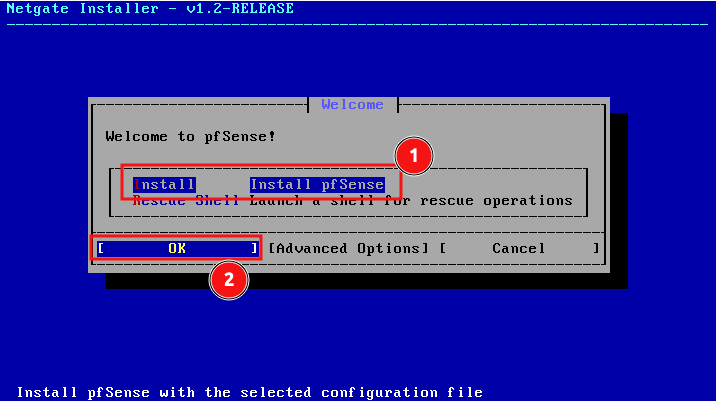
- Install pfSense is highlighted (press
UpandDownarrow key to select different vertical options by highlighting them) - OK is highlighted (press the
Tabkey to select different horizonal options by highligting them)
Hit the Enter to move to the next step.
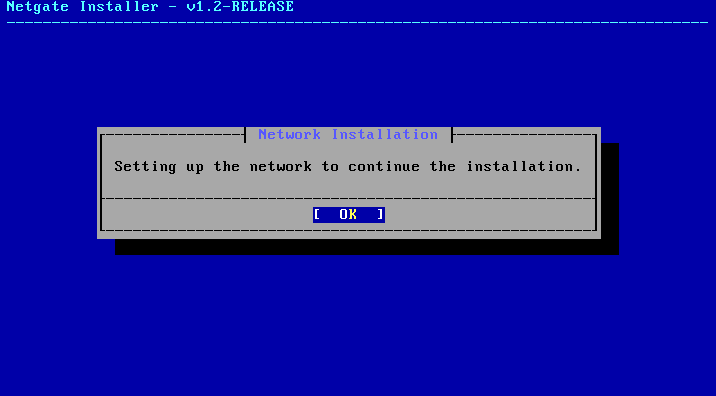
Hit Enter.
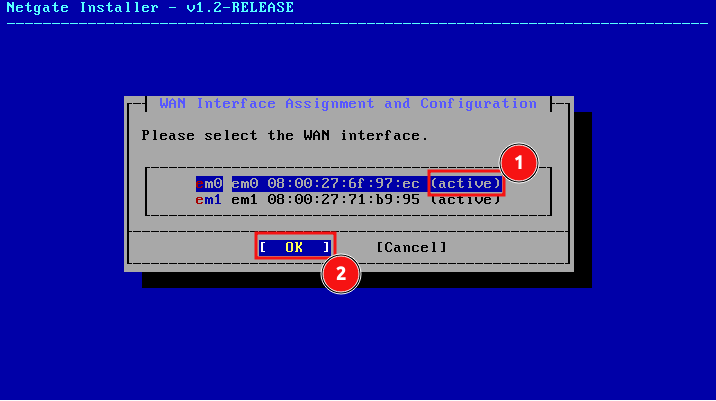
- Select the interface that has (active) to the right of it (you should only have 1 that shows that)
- OK
Hit Enter.
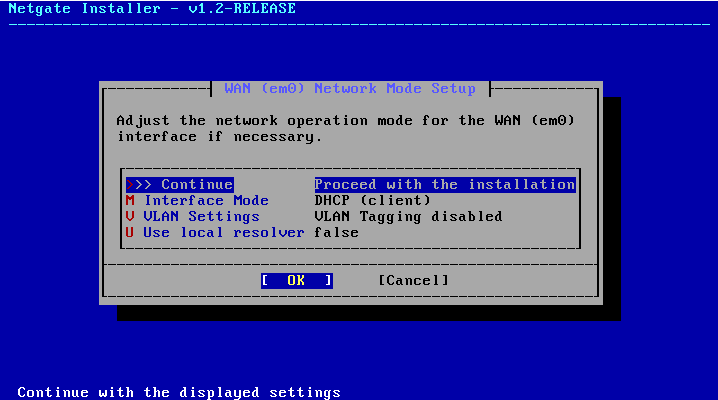
Make sure your settings match what is shown and hit Enter to continue.
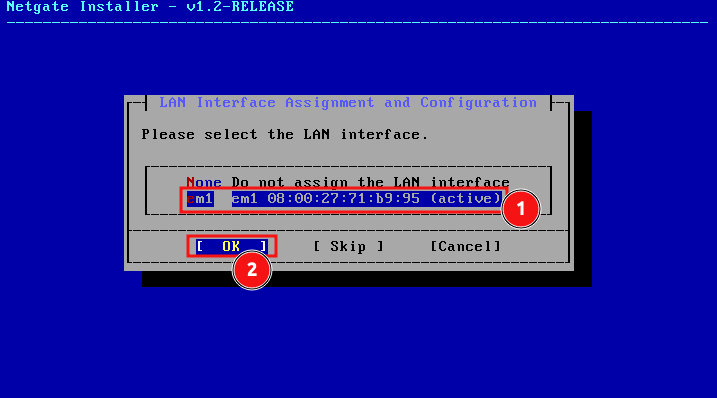
- Select the other interface (yours may not have (active) to the right of it as it will only have 1 Ethernet cord plugged in which is connected to your modem)
- OK
Hit Enter.
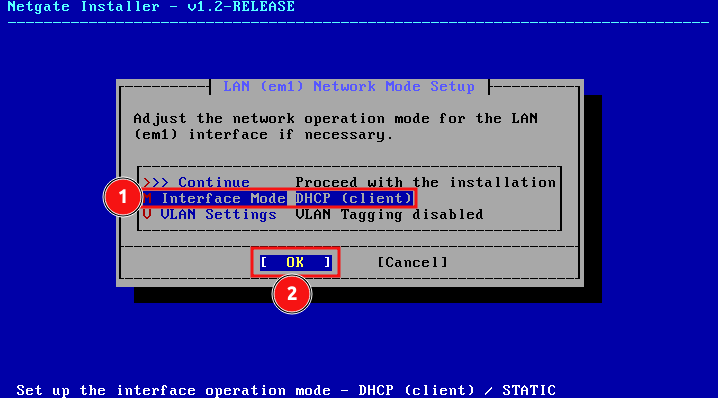
- Select DHCP (client)
- OK
Hit Enter.
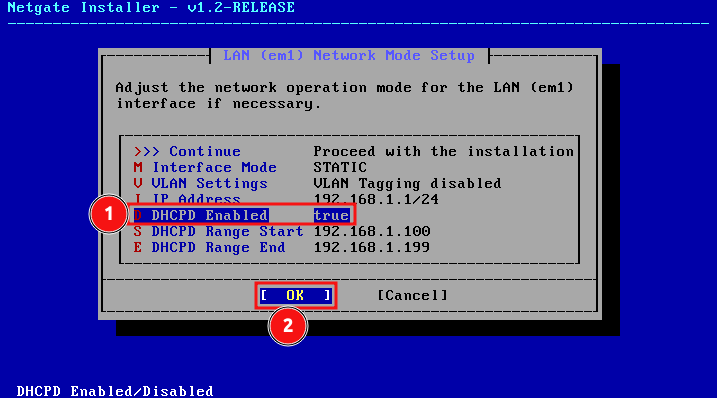
- Select true
- OK
Hit Enter and it will change the DHCPD Enabled option to false.
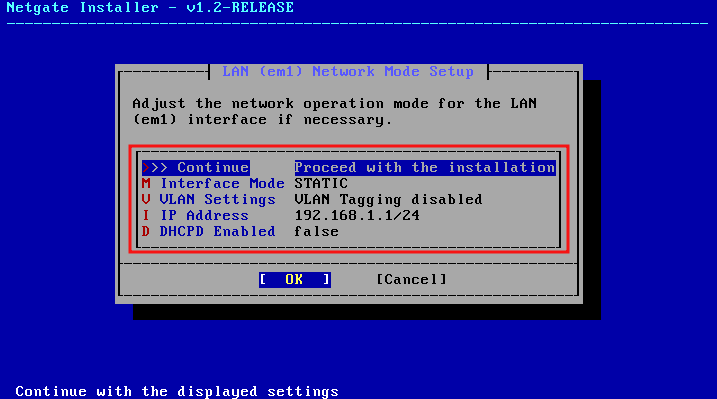
Your screen should match the above screenshot. Ensure Proceed with the installation and OK are highlighted and hit
Enter.
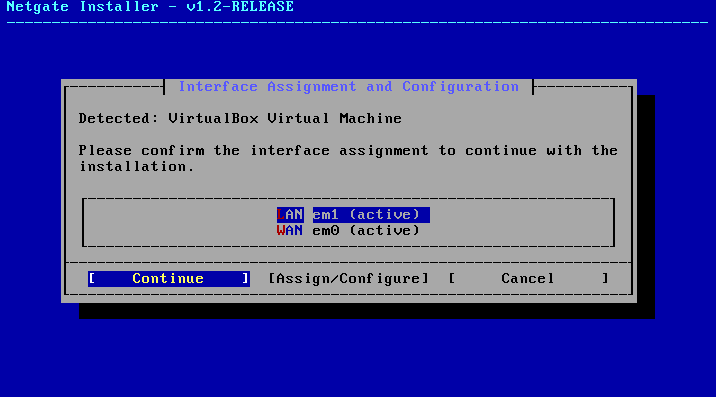
Your LAN interface may not show (active) to the right of it and the interface code may be different but confirm you
have both assigned and Continue highlighted and hit Enter.
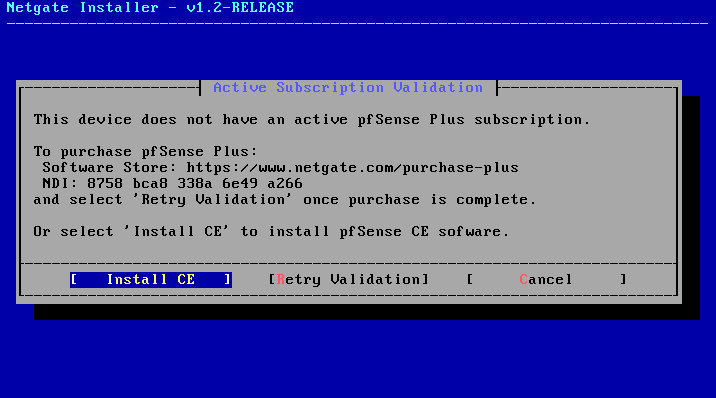
You’ll get a warining about not having pfSense Plus subscription. Just ensure Install CE is highlighted and hit Enter.
CE stands for Community Edition, which is free and open source version of pfSense.
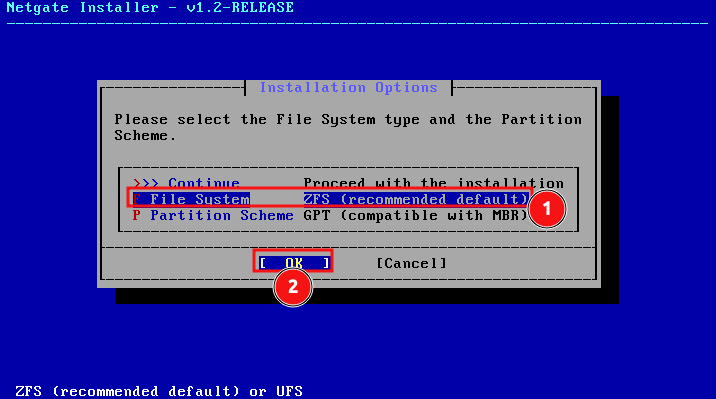
- Highlight ZFS (recommended default)
- OK
Hit Enter. This will change the option to UFS. I’ve personally had issues come up with ZFS file system and it was a pain to
troubleshoot, therefore despite the benefits I opt for UFS file system on installation.
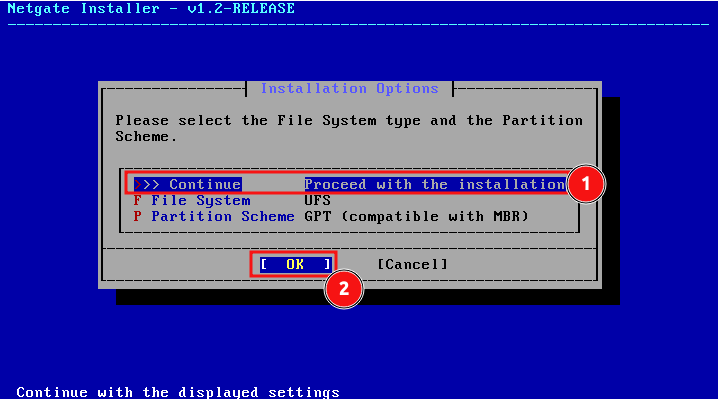
- Highlight Proceed with the installation once UFS is showing as selected
- OK
Hit Enter.
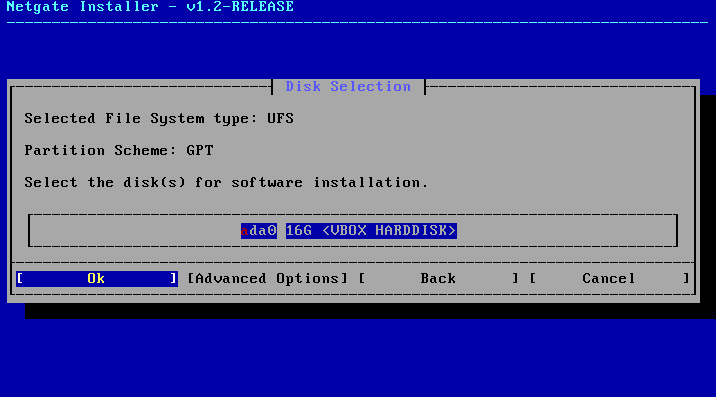
You will typically have 2 or more options shown. One will by your USB drive, the other will be your internal SSD drive (your
mini PC may have multiple drives). Make sure you select the one that matches your internal SSD drive (you can typically tell by
the size of the disk). Select OK and hit Enter.
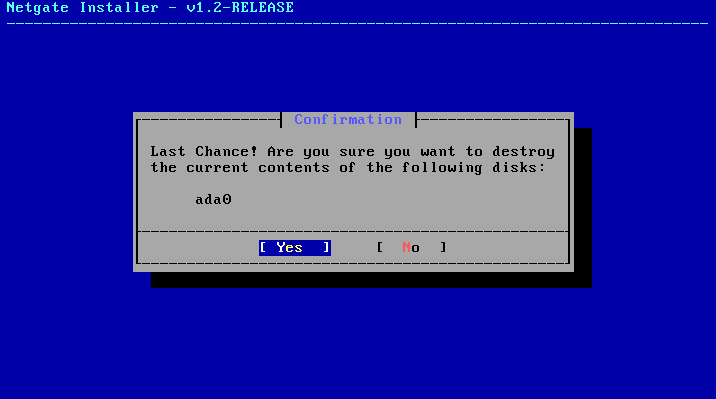
This is your chance to go back to previous menu if you selected incorrect disk or to do make some advanced install configurations.
Ensure OK is highlighted and hit Enter.
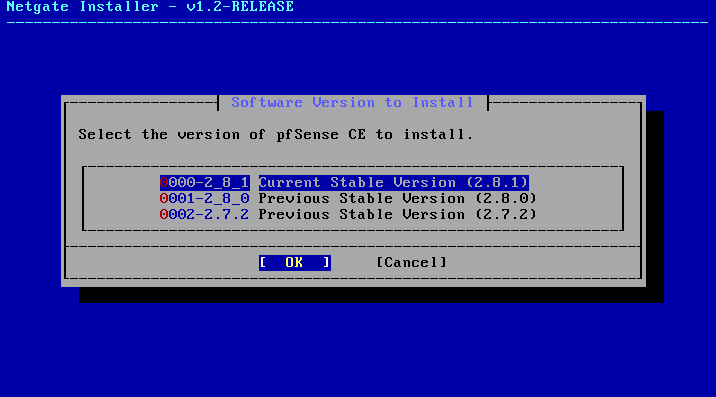
Unless you have a specific reason for selecting previous versions, select Current Stable Version, OK and hit Enter.
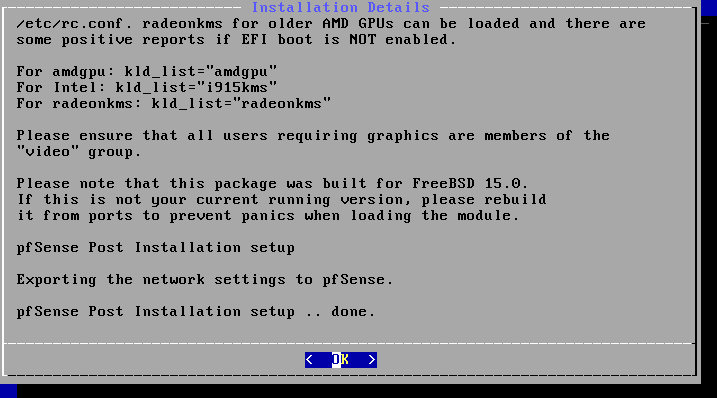
Once you see pfSense Post Installation setup .. done. Hit Enter.
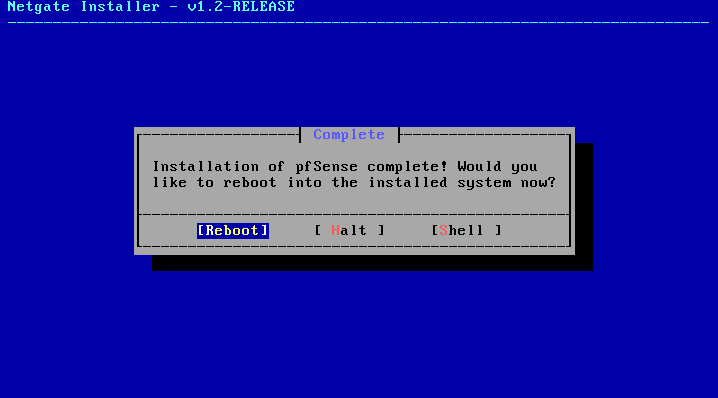
Highlight Reboot and hit Enter.
As soon your mini PC shutsdowns and before it turns back on unplug the USB drive so that the system boots into the internal SSD and the system we just installed loads.
Troubleshooting WiFi Errors
There is a known issue with pfSense not playing well with certain Intel WiFi hardware. If you encounter the issue when you reboot, the following are the steps to fix the problem.
You will know if you’ve encountered the issue because the boot process will hang and you will see output that looks similar to this:
mmc0: No compatible cards found on bus ada0 at ahcich1 bus 0 scbus1 target 0 lun 0 iwm7265Dfw: could not load firmware image, error 6 Fatal trap 12: page fault while in kernel mode...
The iwm is an Intel wireless driver and the iwm7265Dfw is an actual firmware that is attempting to be loaded and causing an
error. The numbers and letters after iwm might be different for you but it would indicate the same issue. Since we’re not
wanting to use the WiFi anyway, you may want to follow this to disable it completely using these steps even if you do not get this
error.
Power off your pfSense, insert the USB drive you used to install pfSense and then power the device back on and ensure you boot into the USB drive and not into the internal drive.
It will restart as if you were installing pfSense for the first time. Hit Enter key on the copyright screen.
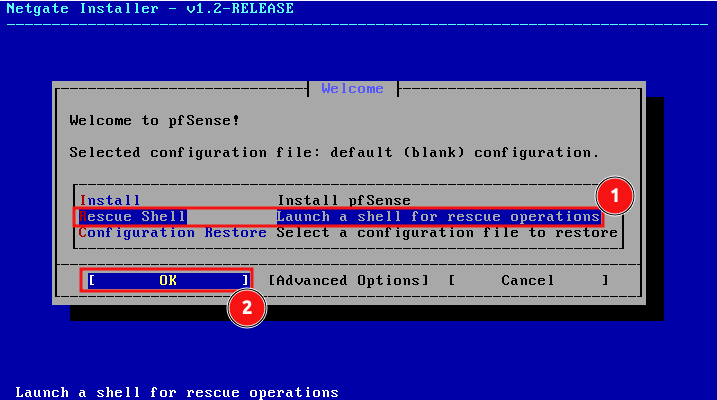
- Rescue Shell
- OK
Hit
Enter.
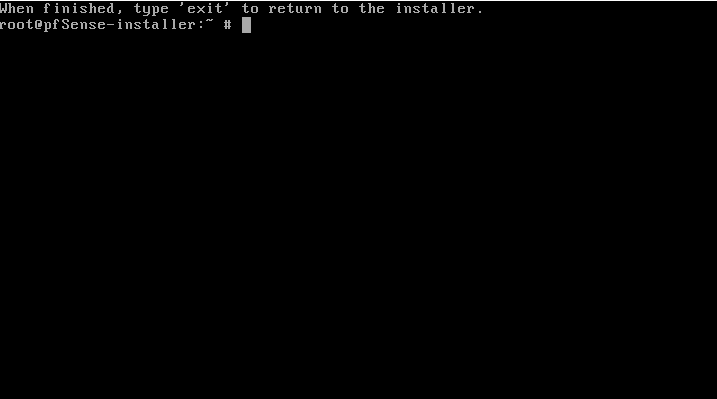
You will be in the terminal screen similar to the screenshot above.
In the shell run gpart show command. In the output you should see a lot of information. At the top it will have your disk name
followed by GPT and size of the disk.
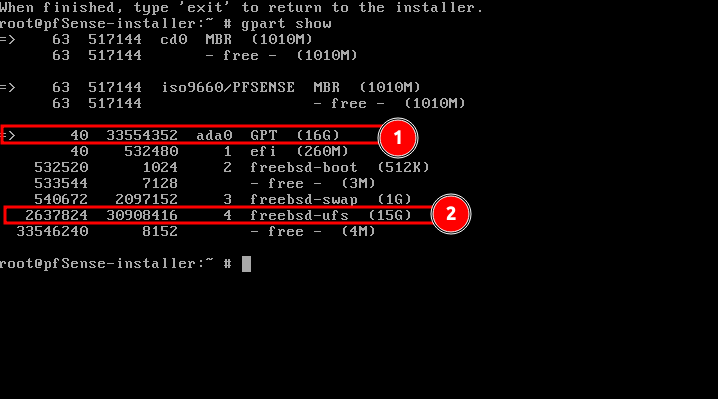
Look for a disk that matches the size of your internal disk size.
Now right below the disk name column (ada0 in my case) you’ll see numbers 1 through 4. Look for one that says something like
freebsd-ufs followed by disk size. That is the partition where your pfSense is installed in. We need to mount that partition and
add a configuration file that will disable the Intel Wi-Fi driver and prevent our installed pfSense from crashing when it boots up.
In my case this was partition 4, which is more than likely yours as well.
Run the following commands. To create a temporary mount point:
mkdir /tmp/boot
Followed by:
mount -t ufs /dev/ada0p4 /tmp/boot
Remember to replace ada0 with the name of your disk and p4 stands for partition 4, so if your freebsd-ufs is in a different
partition number, change that accordingly.
Then run:
touch /tmp/boot/boot/loader.conf.local
The above creates a file in the specified directory path with the specified name.
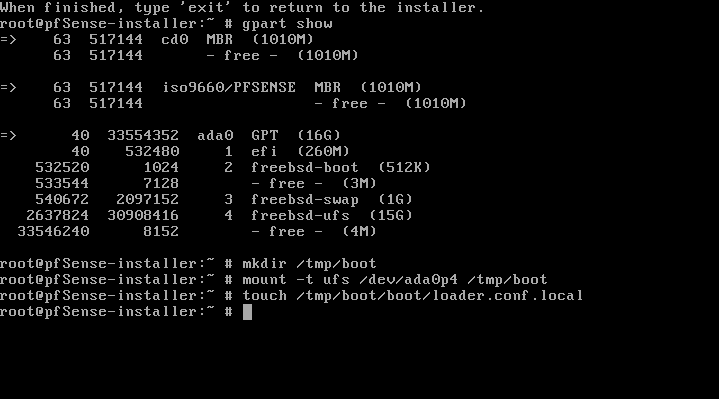
As you can see above, there should be no output when you run the above commands. If you get any output it will be because your commands did not match, simply repeat the commands.
Use vi editor to edit the file we just created:
vi /tmp/boot/boot/loader.conf.local
This is one of the original text editors and can be cumbersome to use. Fortunately, you will not have to use it for very long.
Hit i on keyboard to enter insert mode in the editor and type the following:
hint.iwm.0.disabled="1"
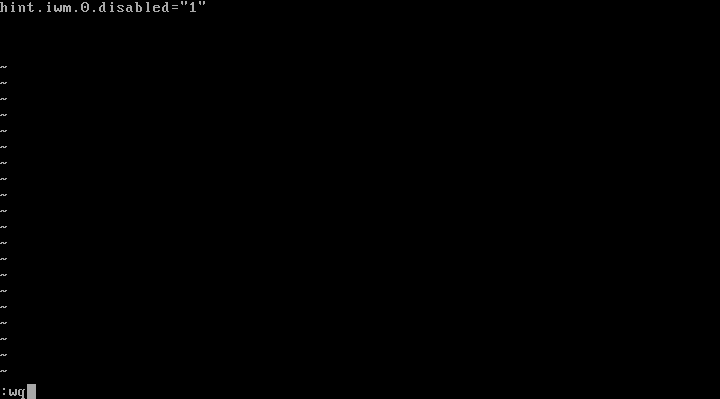
Hit Esc key and then type :wq.
Now simply run the following command to poweroff your pfSense_Appliance:
poweroff
You can now remove the USB drive and power on the pfSense device and wait for it to boot up.
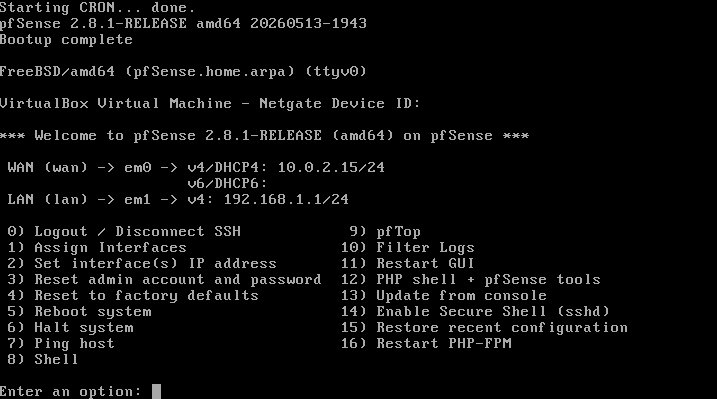
Once the loading process is done you should see similar screen: